Innovation
Patisa Recipe : Mouthwatering Delights
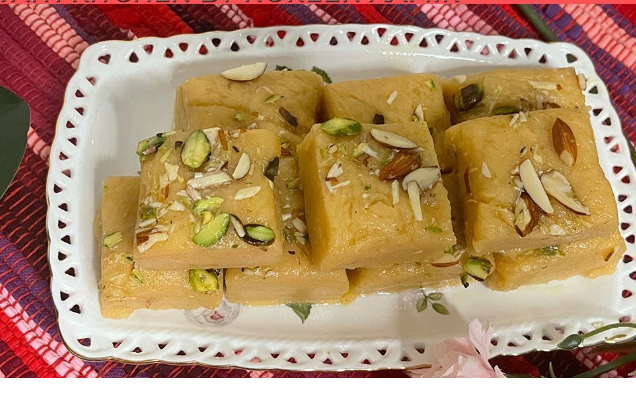
Patisa recipe is a simple, sweet, and crunchy dessert made with gram flour, sugar, and ghee. Patisa, also known as soan papdi, is a delightful Indian sweet that is popular during festivals and special occasions.
Made with a few basic ingredients, including gram flour, sugar, and ghee, this dessert is loved for its unique texture and mouthwatering taste. Patisa is known for its flaky and crispy texture, which melts in your mouth with each bite.
It is often garnished with nuts like almonds or pistachios to add an extra crunch and visual appeal. Whether you’re a fan of Indian sweets or just want to try something new, this Patisa recipe is sure to satisfy your sweet tooth and impress your guests. So, let’s dive right in and learn how to make this delicious treat at home.
Ingredients
When it comes to making the delectable Indian sweet, patisa, the right ingredients are key to achieving its unique texture and irresistible taste. Let’s take a closer look at the essential ingredients that make up this mouthwatering treat.
Gram Flour
Gram flour, also known as besan, plays a crucial role in the preparation of patisa. This gluten-free flour is made from ground chickpeas and has a nutty flavor that adds depth to the sweet. Its fine texture ensures a smooth consistency in the final product. For the best results, it is advisable to use fresh and high-quality gram flour. Remember, the quality of the flour can significantly impact the overall taste and texture of your patisa.
Ghee
Ghee, a form of clarified butter, is another key ingredient that gives patisa its rich and buttery taste. It not only adds flavor but also contributes to the flaky and melt-in-your-mouth texture. The high smoke point of ghee makes it ideal for frying the gram flour, ensuring a crispy golden brown exterior. Using good quality ghee will enhance the overall taste of your patisa, so be sure to choose a reliable and reputable brand.
Sugar Syrup
The final component that brings sweetness to patisa is the sugar syrup. It is made by dissolving sugar in water and heating it until it reaches the desired consistency. The syrup is poured over the fried gram flour strands, allowing them to soak up the sweet goodness. The sugar syrup not only sweetens the patisa but also adds moisture to soften the strands, creating a delightful blend of textures. The syrup is usually flavored with cardamom or rose water, lending an aromatic touch to the dessert.
In conclusion, gram flour, ghee, and sugar syrup are the three essential ingredients needed to create a delightful patisa. The next time you’re craving a sweet treat, gather these ingredients and embark on a culinary journey where every bite will transport you to the vibrant streets of India.
Preparation
Preparing a delicious and mouthwatering Patisa (also known as Soan Papdi) requires a careful and precise approach. From making the perfect batter to cooking it to perfection, each step plays a crucial role in achieving that melt-in-your-mouth texture and sweet flavor that Patisa is famous for. In this article, we will guide you through the process of preparing Patisa, starting with preparing the batter and ending with the final cooking method.
Preparing The Batter
The first step in making Patisa is to prepare the batter. The batter is the foundation of this delectable sweet treat and requires attention to detail. Follow these simple instructions to make the perfect Patisa batter:
- Mix 1 cup of besan (gram flour) and 2 tablespoons of melted ghee in a large bowl. Ensure that the ghee is well incorporated with the besan.
- Add 1/2 cup of powdered sugar to the besan mixture. This will provide the sweetness to the Patisa.
- Gradually add 1/4 cup of milk to the mixture, stirring continuously. This will help in achieving a smooth batter consistency.
- Optional: Add a pinch of cardamom powder and a few strands of saffron for additional flavor and aroma.
Once the batter is ready, set it aside and move on to the next step: cooking the Patisa.
Cooking The Patisa
Now that the batter is prepared, it’s time to cook the Patisa. Follow these steps to ensure a successful cooking process:
- Heat a non-stick pan on medium-low heat and lightly grease it with ghee.
- Pour the prepared batter into the greased pan and spread it evenly using a spatula.
- Cook the batter on low heat, allowing it to slowly set.
- Once the batter starts to set, use a knife to make vertical and horizontal cuts, creating diamond-shaped pieces.
- Continue cooking the Patisa, flipping the pieces gently from time to time to ensure even cooking.
- When the Patisa turns golden brown and crispy, remove it from the heat and let it cool completely.
Once cooled, your homemade Patisa is ready to be enjoyed! With its delicate texture and delightful sweetness, you can savor each bite of this traditional Indian sweet. Make sure to store it in an airtight container to maintain its freshness.
Variations
Tips And Serving Suggestions
When it comes to making and serving Patisa, a popular Indian sweet, there are a few tips and suggestions that can take your experience to the next level. Whether you are a beginner or have some experience in making this delicacy, these tips will help you achieve the perfect texture and flavor. Additionally, we will explore some creative serving suggestions to enhance your culinary presentation. So, let’s dive in!
Storage Tips
While Patisa is best enjoyed fresh, you may have leftovers or want to make a larger batch in advance. To ensure the longevity of this mouthwatering treat, proper storage is essential. Follow these tips to keep your Patisa in pristine condition:
- Allow the Patisa to cool completely before storing it.
- Place the Patisa in an airtight container to prevent moisture and air from spoiling its texture.
- Store the container in a cool, dry place away from direct sunlight.
- Patisa can be stored at room temperature for up to two weeks.
Serving Suggestions
Patisa is not only a delightful treat for your taste buds but also visually appealing. Here are some serving suggestions that will elevate the overall experience:
- Traditional Plating: Arrange the Patisa pieces on a decorative plate and sprinkle some powdered sugar on top. Garnish with slivered almonds or pistachios for an added crunch.
- Patisa Sundae: Take your Patisa game to the next level by layering it with vanilla ice cream and topping it with a drizzle of chocolate syrup. This delectable combination of hot and cold will surely impress your guests.
- Patisa Parfait: Create a delightful and visually appealing dessert by layering crumbled Patisa, whipped cream, and fresh fruits in a glass. Repeat the layers and top with a cherry or mint sprig.
- Patisa Bites: Transform your Patisa into bite-sized treats by cutting it into small cubes. Serve them on toothpicks or cocktail sticks for easy grabbing at parties or gatherings.
- Patisa Milkshake: Blend crushed Patisa with milk, a scoop of vanilla ice cream, and a pinch of cardamom powder. This creamy and aromatic milkshake will be an absolute delight, especially during hot summer days.
These serving suggestions are just the tip of the iceberg. Feel free to experiment with different toppings, sauces, and presentations to create your own unique twist on this classic Indian sweet. Enjoy!
Conclusion
To sum up, this Patisa recipe offers a delightful treat that is easy to make and perfect for satisfying your sweet tooth. By following this step-by-step guide, you can create a delicious, aromatic dessert that will impress your family and friends.
So, why wait? Give this recipe a try and indulge in the heavenly combination of crispy layers and mouthwatering syrup. Happy cooking!

Everything You Need to Know About PS6: Release Date, Features, Price, and Exciting Updates

Navigating Business Transitions: The Role of ESOPs in Small Business Succession Planning

Top 10 Popular Abandoned Places on Long Island

Most Haunted Places in Iowa: Explore the Eerie Secrets

Which Lace is Better for Dark Skin: Discover the Perfect Match

Best Manual Transmission for 5.9 Cummins: Shift with Strength!

Essential Welding Tools and Equipment List: Everything You Need to Know

60 Most Profitable Business to Start with 20k in 2023

Understanding Business Loan Requirements: A Comprehensive Guide for Small Business Owners

8 Cheapest Business Insurance Providers of 2023: Don’t Miss!

Is Junk Removal Business Profitable? How to Start a Junk Removal Company

How to Start a Car Dealership with No Money: A Step-by-Step Guide
Essential Welding Tools and Equipment List: Everything You Need to Know
60 Most Profitable Business to Start with 20k in 2023
Understanding Business Loan Requirements: A Comprehensive Guide for Small Business Owners
8 Cheapest Business Insurance Providers of 2023: Don’t Miss!
Is Junk Removal Business Profitable? How to Start a Junk Removal Company